
Mini Donut Cookie Decorated with Royal Icing – Valentine Presale

Christmas is over and 2026 is here! Time to start think about Valentine’s!
This year for Valentine’s I will be offering several presale items and this one is certainly one of my favorites!
Presale items will be available for purchase for my local customers January 25th, and can be found on my “shop” page. But I wanted to get the tutorial out early in case anyone is looking for Valentines cookies they can do themselves.
This is a great cookie for beginners because it is small, and although there are a few layers of steps they are all simple and come together for a real professional look!
Supplies
Cookie Cutter, mini sized. This is a set of two cutters, I will be using them both in a tutorial coming out in a couple of weeks.
Cookie Card, these are the physical cards but she also has a digital download version if you want to print them yourself!
Check out this post for recipes and supplies I recommend for cookie decorating!
Icing Colors
These formulas are made with Chefmaster Gel Food Coloring in 283g of icing. Please adjust accordingly.
Ivory: 4 drops Liquid Whitener, 6 drops Ivory, 2 drop Sienna [Outline and Flood Consistency]
Light Pink: 9 drops Liquid Whitener, 1 drop Super Red, 1 drop Rose, 1 drop Coal Black [Outline and Flood Consistency]
Red: 4 drop Liquid Whitener, 10 drops Super Red [Outline Consistency]
Light Lavender: 8 drops Liquid Whitener, 1 drop Rose, 1 drop Coal Black, 1 drop Sky Blue [Outline Consistency]
Blue: 6 drops Liquid Whitener, 3 drops Sky Blue, 2 drops Coal Black, 1 drop Leaf Green [Outline Consistency]
Instructions
Use your ivory “Outline” consistency to make a border along the outside of the circle and inner heart.

Fill in the cookie with the Ivory “flood” consistency.

Put cookie in a food dehydrator with the door open at the lowest temperature for 7 minutes. OR put cookie in front of a fan for around 10 minutes.
Outline the heart and create the design of an iced donut with light pink “outline” consistency.
*optional, but highly recommended* use the same outline consistency and add a lot of squiggles. This will help prevent your next layer from caving in (known as cratering).

Fill in the icing design with light pink flood consistency.

Put cookie in a food dehydrator with the door open at the lowest temperature for 7 minutes. OR put cookie in front of a fan for around 10 minutes.
Use the blue, red, and lavender outline consistency to create small sprinkle like lines.


Done!!
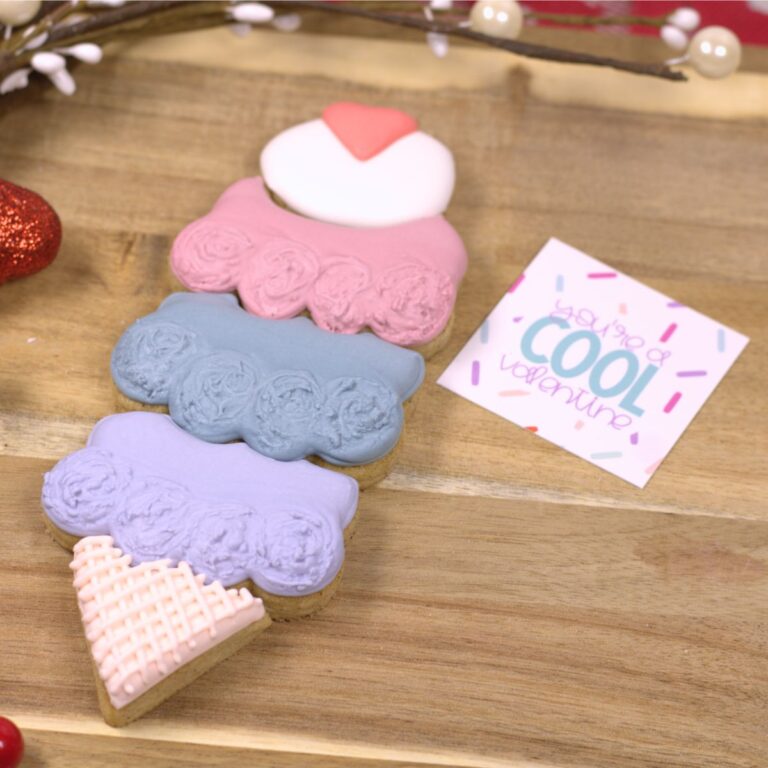
Is that not just the CUTEST little donut cookie?!
Time to dry. Cookies need to sit in front of a fan for 24 hours before they are ready to be sealed in a cellophane bag. Do not skimp on this. Icing that is not fully dry will stick to the bag.
FAQ
How long should I wait after outlining my cookies before adding the flood icing?
I prefer to let the outline consistency dry just a touch before flooding. I do not have an exact time. When I need to decorate multiple cookies of the same design I will outline them all and then go back and flood.
I have found my flood consistency is less likely to overflow off the sides [SO. FRUSTRAING] when I let the outline dry a bit.
Do I need to let them dry 24 hours if I am not going to heat seal them?
I LOVE eating cookies with soft icing, if I am not selling them I usually just eat them when my design is done. Waiting 24 hours will help the icing hold it’s shape even just stacked on a platter. But if not heat sealing I would be comfortable not being making it quite to the 24 hour mark.
Let Me See What You Make!
Use #thehandcraftedcookie to let me see what you decorate!
Pin For Later





This looks so delicious. Your instructions and photos make me feel like this is actually doable. I don’t think my girls and I will wait for Valentine’s Day to try this out. You’ve got to practice to get it right, right? 🙂
These look yummy and fun to make!